When it comes to performance testing web applications using JMeter, you need to ensure that each JMeter thread (virtual user) acts like a real user using a real browser and has the same network footprint — meaning it sends the same HTTP requests as the real browser does.
The easiest way of creating your test plan skeleton is by going through your test scenario steps in the browser and configuring JMeter to record the requests originating from the browser. Then you would convert them into JMeter’s HTTP Request samplers.
JMeter comes with HTTP(S) Test Script Recorder (previously known as HTTP Proxy Server). This feature runs between the browser and the system under test, intercepts requests from the browser, and saves them as HTTP Request samplers so you can replay your test scenario after recording.
It is significantly faster than inspecting request details using a network sniffer tool or browser developer tools because JMeter does the majority of work for you.
In this blog, I will take you through how to configure an HTTP JMeter proxy server by using a BlazeMeter dummy website that can be used for practicing load testing with JMeter and BlazeMeter.
Configuring JMeter Proxy Server For Recording
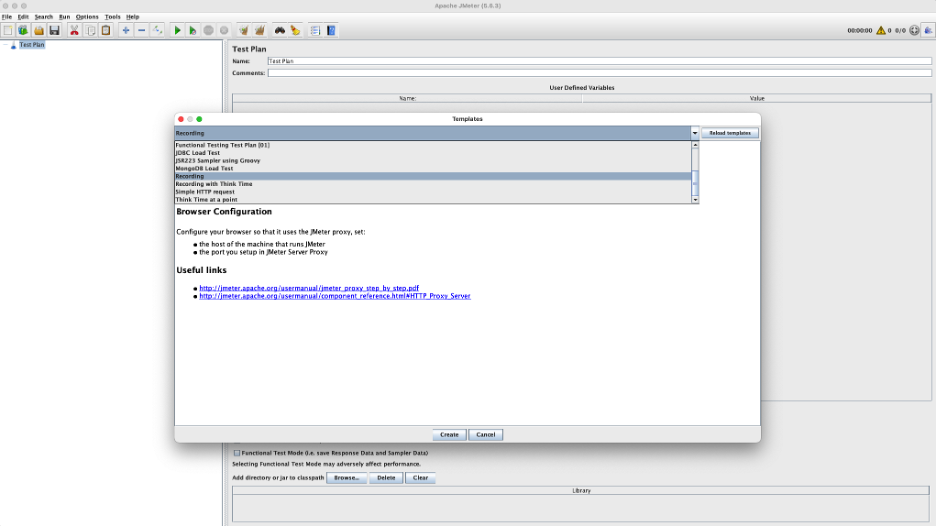
The best way to set up a JMeter Proxy Server is by using the JMeter Templates feature. Pre-defined templates can be accessed from “Templates” menu entry under “File” JMeter main menu group:

Once you open it, there will be a drop-down with several JMeter templates for various protocols and tasks. The one you need is called Recording:
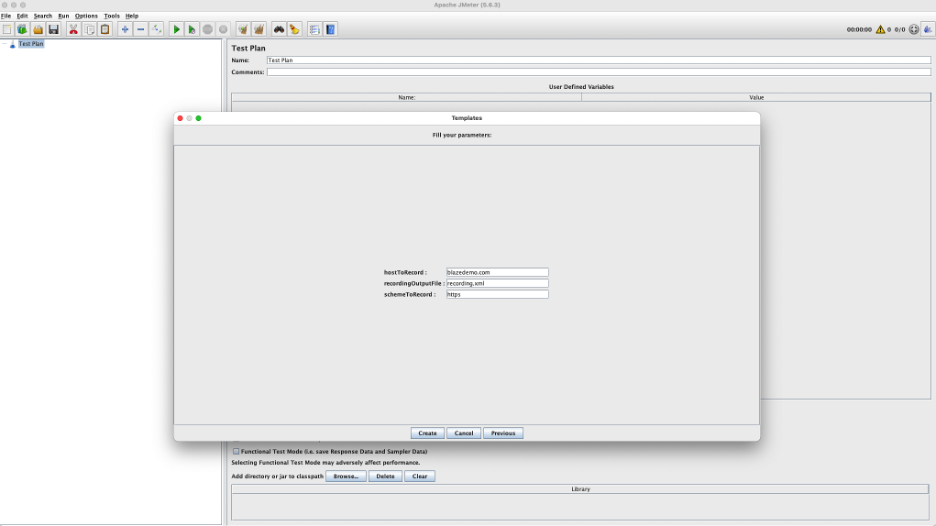
Once you choose it and click “Create,” the option will come up where you can specify scheme (protocol) and host (IP address or hostname of the system under test).
In our case, we are going to record the blazedemo.com website and use https protocol:
After clicking “Create,” JMeter will generate a Test Plan suitable for recording with HTTP(S) Test Script Recorder added:
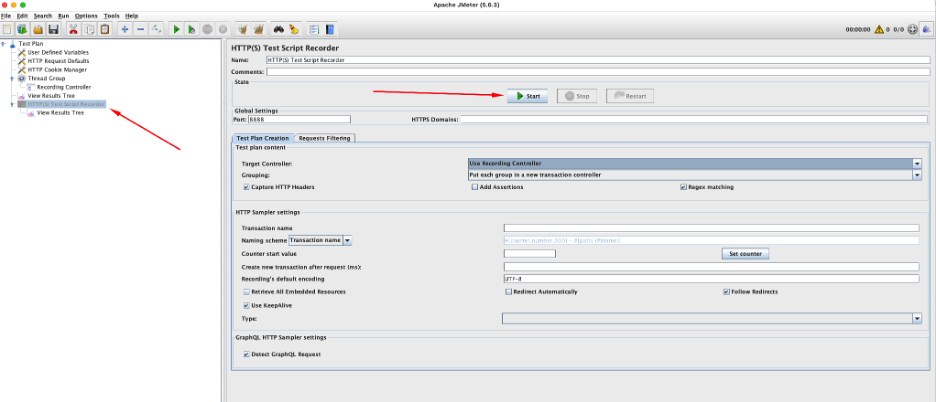
Then, simply click the “Start” button in order to start the JMeter Proxy Server.
When you click the “Start” button, you will see a message that says JMeter has generated a certificate in its “Bin” folder and the file is called ApacheJMeterTemporaryRootCA.crt
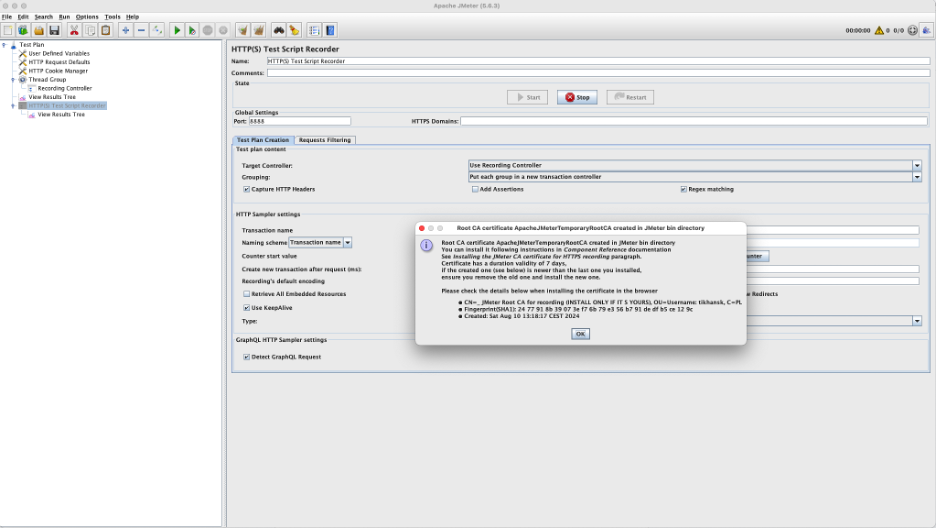
If you are recording the https protocol, it means that communication between the browser and the system under test is secure and encrypted, and no one can see what is being sent and received — including JMeter. In order to enable JMeter to decrypt secure traffic and generate the relevant HTTP Request samplers you will need to install JMeter’s certificate into your browser.
Configuring Browser For Recording
Importing JMeter Certificate
There are several popular browsers to choose from, but I would recommend using Mozilla Firefox for recording. The main two reasons are:
- Firefox has proxy configuration independent from the operating system.
- Firefox has certificate management independent from the operating system.
It makes sense to install the certificate and set the proxy only for the browser. Otherwise, it may impact other applications, network/Internet connectivity, and more.
Now, let us start with the certificate. Firefox Certificates Manager lives under Settings -> Privacy & Security -> View Certificates:
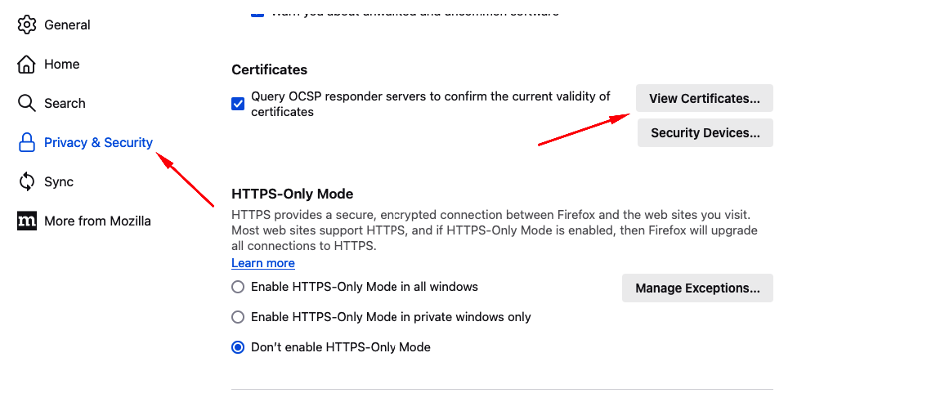
Or you can enter “certificates” in the settings search input field, and you will get to the same place without having to scroll.

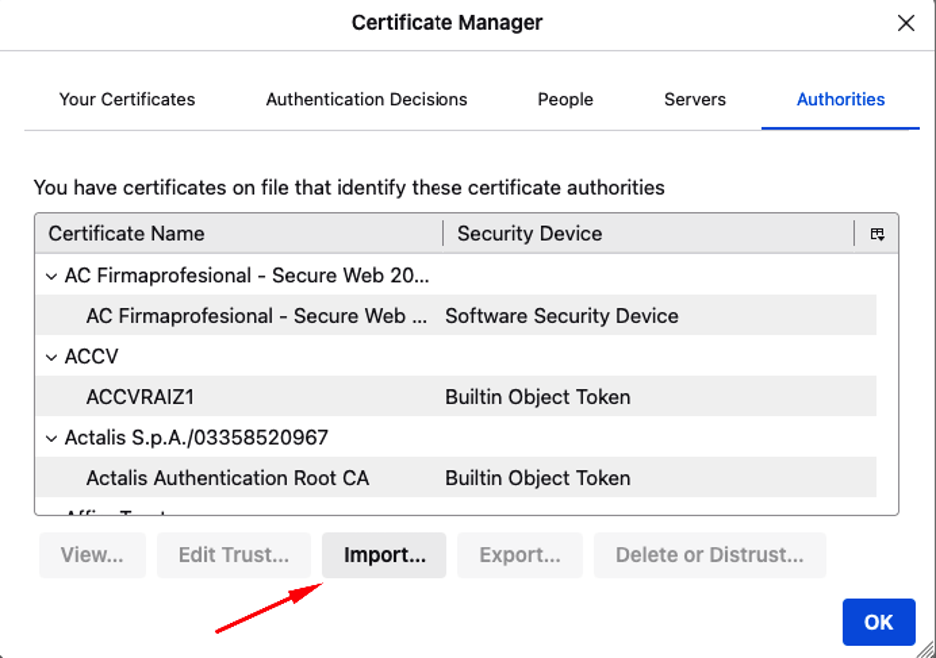
Click “View Certificates” and a window with all available certificates will be shown. You will need to click “Import” button and locate the ApacheJMeterTemporaryRootCA.crt file:
Once you find the JMeter’s certificate you need to allow it to identify websites:
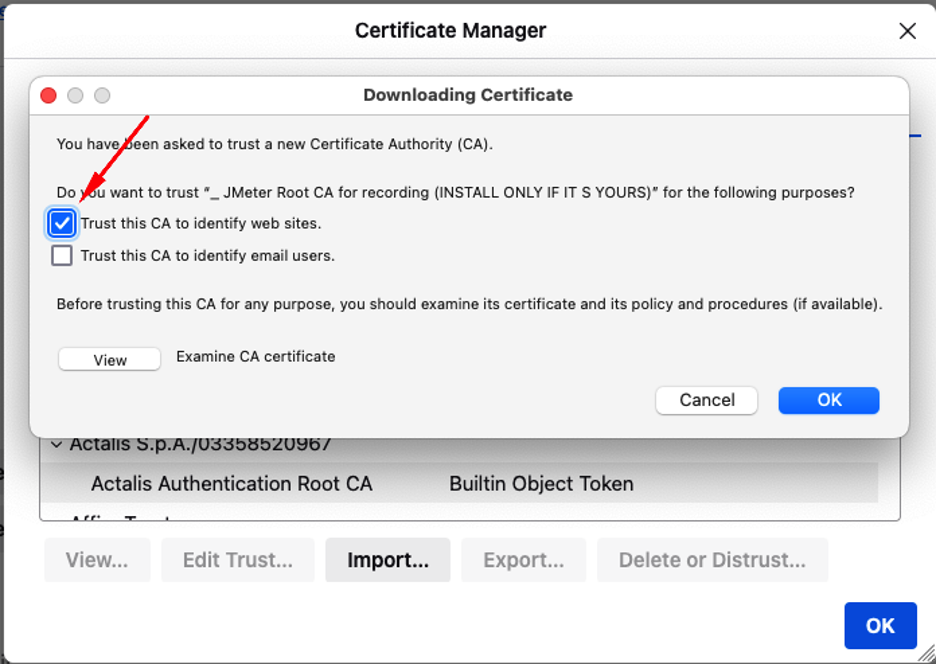
Then click “OK” to close certificates settings. This part is complete.
Configure Browser to Use JMeter as a Proxy
Firefox Proxy Configuration can be reached similarly to the certificates management tool. Type “proxy” in the search field:
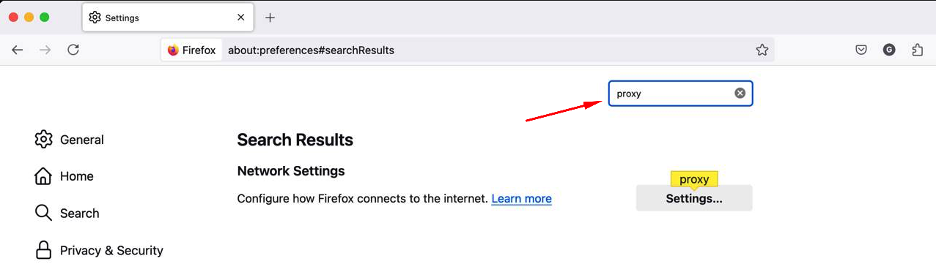
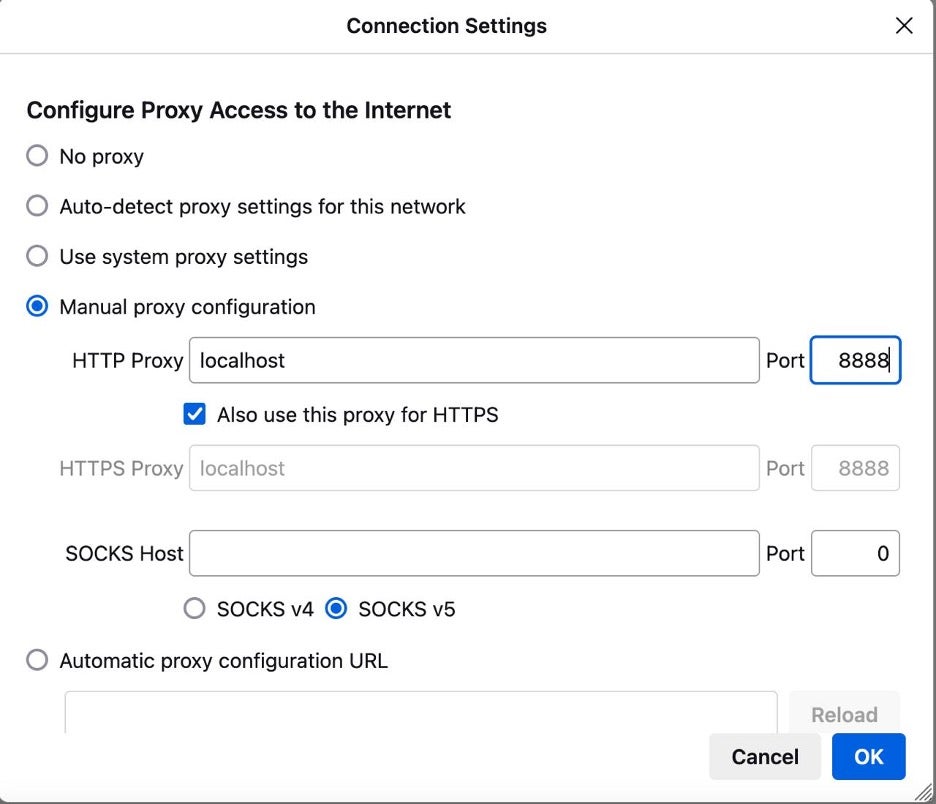
In the Proxy Settings, you will need to specify localhost as the HTTP Proxy Host, 8888 as the proxy port, and tick Also use this proxy for HTTPS box:
Now you are ready to record your test scenario. Close Settings, open the normal tab, type the URL and proceed.

As you can see, each step in the browser results in a HTTP Request sampler and JMeter captures request parameters.
Here you can also give requests, assign transaction logical names, or tell JMeter to use the current URL as the Sampler name or whatever your naming convention is.
Recording Tips and Tricks
What to Record
As I mentioned previously, a well-behaved JMeter test script must produce the same network footprint as the real user using the real browser. That means you should not be recording calls to so-called “embedded resources” (e.g. images, scripts, styles, fonts, sounds, etc.). Instead, you should exclude them from the recording scope in “Requests Filtering” tab of the HTTP(S) Test Script Recorder.
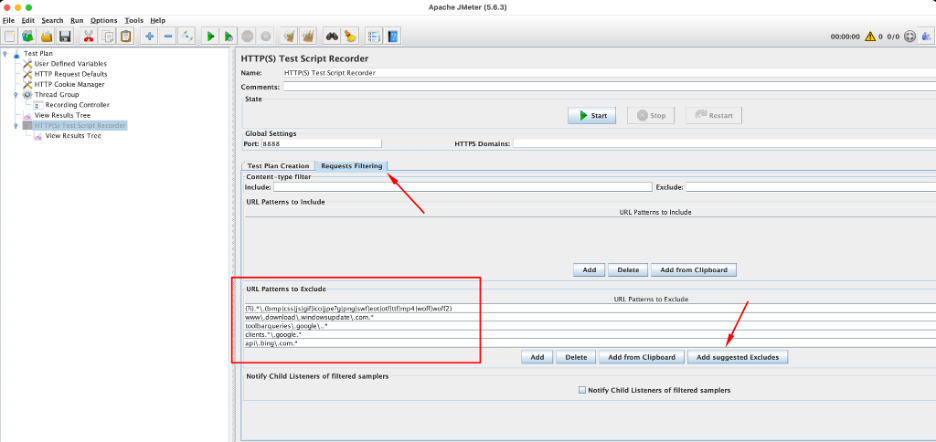
Clicking the “Add suggested Excludes” button generates some common excludes, but you might want to add your own if these will not match your needs. Real browsers download these “embedded resources” using a parallel thread pool (if you record and replay the requests will be sequential). Moreover, real browsers do it only once and on subsequent calls the content is being returned from the browser cache.
The same process applies to third-party websites. You should focus only on the system under the test domain(s). Calls to external URLs or CDNs for banners, videos, etc., should also be excluded from both recording and testing scopes.
Working With AJAX Requests
AJAX requests are somewhat similar to the embedded resources. The difference is that as of the JMeter 5.6 release, there is no support for a proper replay pattern. This means you should record AJAX requests, but when it comes to replay you need to use Parallel Controller
Protocols other than HTTP/1.1
The system under test can use other protocols like WebSockets or HTTP/2. With JMeter 5.6, these requests will not be recorded — so you need to inspect the requests from the browser to the system under test using either browser developer tools or a sniffer tool. If you spot anything other than HTTP/1.1, you will need to handle it separately using suitable plugins.
Troubleshooting a HTTP JMeter Proxy Server
Here are the most common problems associated with configuring a HTTP JMeter proxy server and how you can diagnose and solve them.
No Connection to the Internet and/or to the System Under Test
Your machine may require a proxy to reach the Internet or the application you are trying to record. When you substitute a default proxy configuration with JMeter, the browser cannot connect anything which requires a proxy. The solution is to make JMeter aware of this upstream proxy.
Browser is Showing Certificate-Related Error
If you see an error like this:
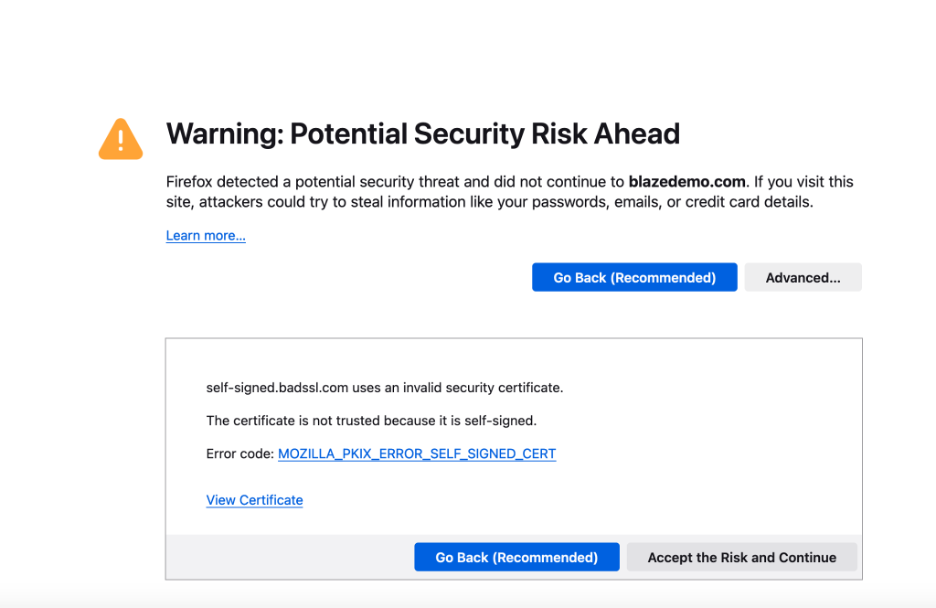
It is expected because JMeter’s certificate is self-signed and the browser warns you that the certificate is not known to any of the authorities. In this case, click “Accept the Risk and Continue.”
In case of other certificate-related errors, it should be sufficient to clear the browsing data either for a single website or complete browsing history because it might be that the browser “remembers” you have previously visited the website without a JMeter proxy; it now detects an unexpected certificate in the chain and does not let you in for security reasons.
Other Ways For Recording a JMeter Test
Using JMeter’s HTTP(S) Test Script Recorder is not the only way for recording a JMeter test. Others include:
- BlazeMeter Chrome Extension: With this tool, you will not have to worry about proxies and certificates. It can also generate a Selenium version of your script for frontend testing.
- JMeter Correlation Recorder Plugin: This provides a handy interface for setting correlation rules (if you need to extract some dynamic parameters). It is also possible to let the plugin detect and handle dynamic parameters automatically.
- BlazeMeter Proxy Recorder: This feature makes it easy to use a proxy server for desktop and mobile. It allows for exporting of recorded scenarios in “SmartJMX” mode with automatic detection and correlation of dynamic parameters.
- BlazeMeter Converter: This creates JMeter test scripts from various network requests dump formats like PCAP, HAR, Selenium, etc.
Bottom Line
Configuring an HTTP JMeter proxy server is a great way to overcome obstacles when performance testing apps using JMeter. It is much faster at sorting through much of the browser details you would normally do manually or with an external plugin because JMeter does much of the heavy lifting for you.
BlazeMeter excels at elevating your JMeter and testing in general — and your JMeter performance testing using web browsers specifically. These two powerful platforms combine for unprecedented levels of efficiency and effective testing.
The best part? You can get started using BlazeMeter with your JMeter tests for FREE today!